Find them all
Cauldrons in Horizon Forbidden West: where to find them and how to complete them
We help you find all the Cauldrons available in Horizon Forbidden West and tell you how to get to the core, complete them and what you’ll receive.

In Horizon Forbidden West we will find several Cauldrons that we can explore and master in order to increase the number of machines to sabotage and thus fight for us or use them as mounts. We will find up to six different ones, two of which are related to the main story. Since completing them can be somewhat complex, we tell you step by step what you have to do to find and reach the core of all Cauldrons.
All Cauldrons of Horizon Forbidden West
To begin with, the TAU and GEMINIS Cauldrons are completed automatically as part of the story. Even so, they are somewhat convoluted and have scenario puzzles inside, so in each corresponding chapter, we tell you how to overcome them step by step.
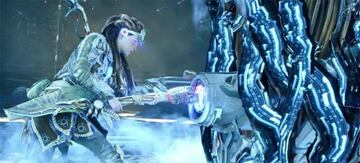
Cauldron TAU
- Completed during the main mission of The Dying Lands.
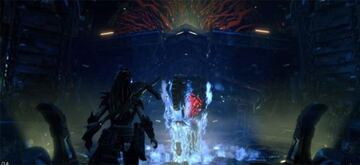
Cauldron GEMINI
- Completed during the main quest, Gemini
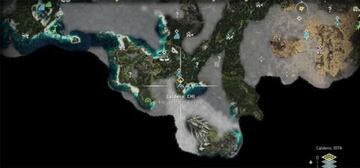
Cauldron: MU
- Where to find it on the map?

We advance until we reach the interior of the Cauldron and once there we use the available zip lines to reach a platform on which we can sabotage a network link. We continue to do the same in a closed door and on the other side we use the hook to rise to a platform from which to jump to a transport. It will take us to another platform and there we must look at the wall with horizontal sheets, as climbing on them (when they are active) will be our mission.
We continue without too much complexity (we find a Shell-Walker along the way, but it is not necessary to knock it down) and use the mobile robotic arms to advance to another "ladder" of horizontal blades. A new transport will be our ally to transport us to a new area of moving arms. Wait for them to move to the right point to avoid falling into the beam sea at our feet. Finally, we will manage to reach the core room and there we just have to activate it and kill a Widemaw to complete it.
- Unlocks: Burrower, Scrounger, Grazer, Scrapper, Fanghorn y Widemaw.
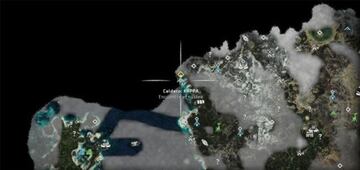
Cauldron IOTA
- Where to find it on the map?
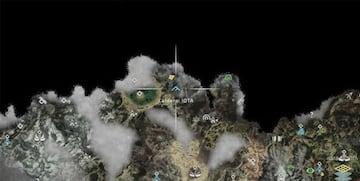
We descend to the depths of the cave and use the shield wing to advance without falling into the sea of lava below. We sabotage a door to continue and there we do the same with a network link to activate the nearby mobile structure and be able to climb it. If we look closely at the horizontal blades of light is not too difficult. We reach an area with several machines, which we can knock down or not depending on our preferences (it is advisable to do so in this case so they do not bother us) and after climbing a wall with blades that are deactivated from time to time we will reach a room with a stuck Tallneck.
After finishing with a Rollerback in the area we will be able to sabotage the Cauldron's core. To leave the place we will have to sabotage the link of a nearby door, platform through the area and get to the head of the Tallneck. We travel automatically until Aloy tells us to go down and return to the room where it is found the body of the Tallneck so that both pieces are joined, we can sabotage it, and thus emerge to the surface and we with him.
- Unlocks: Leaplasher, Glinthawk, Lancehorn, Longleg, Clawstrider, Skydrifter, Bellowback, Ravager, Snapmaw y Rollerback.
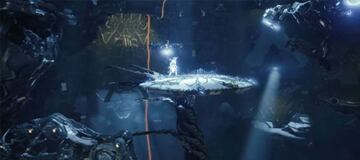
Cauldron CHI
- Where to find it on the map?
We find the entrance behind a waterfall located on the right hand side of the blocked door of the Cauldron. Once inside, we advance until we can use the hook and thus unlock a grip of light to climb. In the next room we finish with the patrolling machines and return to use the hook on the ledges illuminated in blue. To reach them we approach the shell of the Shell-Walker and let go of it before dragging it to the wall. This way we can climb up and move forward and finish off a few more machines in the dark.
To reach the upper level we use the hook and thus move a giant metal arm. We use the hook again to get on it and reach a platform that descends after sabotaging it. There, in the core room, we will see that something will go wrong and we will have to follow a trail to one more crab crate. We push it as far as we can towards a transparent barrier and go around it to get to the other side and drag it with the hook from there.
To reach the upper level we use the hook and thus move a giant metal arm. We use the hook again to get on it and reach a platform that descends after sabotaging it. There, in the core room, we will see that something will go wrong and we will have to follow a trail to one more crab crate. We push it as far as we can towards a transparent barrier and go around it to get to the other side and drag it with the hook from there.
Unlocks: Frostclaw, Redeye Watcher, Shell-Walker, Clamberjaw, Behemoth, Stalker, Shellsnapper, Spikesnout, Scorcher y Fireclaw.
Cauldron KAPPA
- Where to find it on the map?
Finally, we find this Cauldron submerged, so we need to have advanced far enough in the story to have the vent. Once inside we dive and dodge the Snapmaw that swims around the place until we reach dry land. There we use the hook to drag a box and when we get on it we can reach the climbing points of a nearby wall. We get to the point of sabotaging a network link and on the other side of the door awaits us the core room.
It will not be so easy, as we have to do some more climbing (because we do not reach the central part of the room with the first jump). We go around the area below until we sabotage a network link and a platform under our feet rises. Then we can climb out of the water by sabotaging a nearby device. From there we advance until we can find a box to drag with the hook to use as elevation and thus climb to raise the water level again in a net link located above. From there we can jump into the water and dive to lower the water level in a submerged net link. We go back up and from the current water height, we drag the crate to climb up to the upper room, where one more control pump awaits us.
After interacting with it we must continue (where we have left the box if we have done well) to reach an airlift that takes us to a path that leads to the core room. With the new water level, we can now dive with the aim of reaching the network link of the hydraulic gate and then sabotaging the lower pump. This will finally get us to the core, where an enemy machine awaits us to defeat.
- Unlocks: Rockbreaker, Tideripper, Tremortusk, Stormbird, Thunderjaw, Slitherfang, Dreadwing, Slaughterspine.
Currently, comments are disabled. We are working on improving this service.