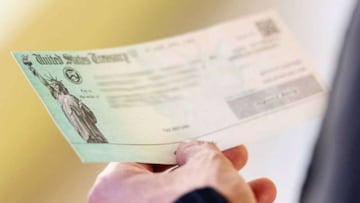
Check format explained: Parts of a check, what the numbers mean and how to write one
Digital banking is more prevalent than ever, but a surprising number of people still use checks for transactions. Here are the parts of this piece of paper.
Update:

In this day and age of digital banking, it could be hard to believe- especially for the generation which has had access to the internet all their lives- that many people still use good old-fashioned paper checks. According to GOBankingRates, more than half of Americans wrote one last year.
If you are one of those who still make use of this piece of paper for financial transactions, it’s best to be careful when writing one out so as to avoid mistakes and minimize the chance of being a victim of fraud.
A check typically consists of several parts, each with a specific purpose.
The common parts of a check
- Bank name and logo: This indicates to the recipient where the money will come from.
- Payor/Payer: This is the person or entity who writes the check and authorizes the payment. It is usually located at the top-left corner and may include the payor’s name, address, and sometimes their phone number.
- Payee: This is the individual or organization to whom the payment is being made. The payee’s name should be written clearly on the “Pay to the order of” line, typically located in the center of the check.
- Date: The date when the check is being written. It is usually located at the top-right corner or near the payor’s information.
- Dollar box: This is where you write the numerical value of the amount you wish to pay. It is located on the right-hand side of the check, preceded by a dollar sign ($).
- Amount in words: This is where you write the amount in words. It is located below the payee line and is used as a redundancy to prevent alteration or misunderstandings.
- Memo line: This line allows you to include a brief description or note regarding the purpose of the payment. It is optional and can be found near the bottom-left corner of the check.
- Signature line: The payor’s signature is required to authorize the payment. It is typically located at the bottom-right corner of the check, and is supposed to ensure that the transaction is legitimate.
The numbers printed at the bottom of a check
- Routing number: This 9-digit ABA (American Bankers Association) routing number identifies the financial institution where the payor’s account is held. It is used to ensure the check reaches the correct bank for processing.
- Account number: This is the unique identifier for the payor’s bank account. It helps the bank identify the specific account from which the funds will be withdrawn.
- Check number: This number is a sequential identifier for the individual check. It assists in tracking and record-keeping purposes.
Steps in writing a check
- Date the check near the top-right corner using the current date.
- Write the payee’s name clearly on the “Pay to the order of” line.
- In the dollar box, write the numerical value of the payment amount, including cents. For example, “$250.25.”
- On the line below the payee’s name, write the amount in words. Use words for the dollars and cents, with the cents represented by a fraction, followed by the word “only” to prevent alterations. For example, “Two hundred fifty and 25/100 dollars only.”
- If desired, fill in the memo line with a brief note describing the purpose of the payment.
- Sign the check on the signature line using the same name that appears on the front of the check.
Remember to keep a record of the check by noting the details in your register, to track your payments accurately and balance your checkbook.


